

User Guide
Color Play
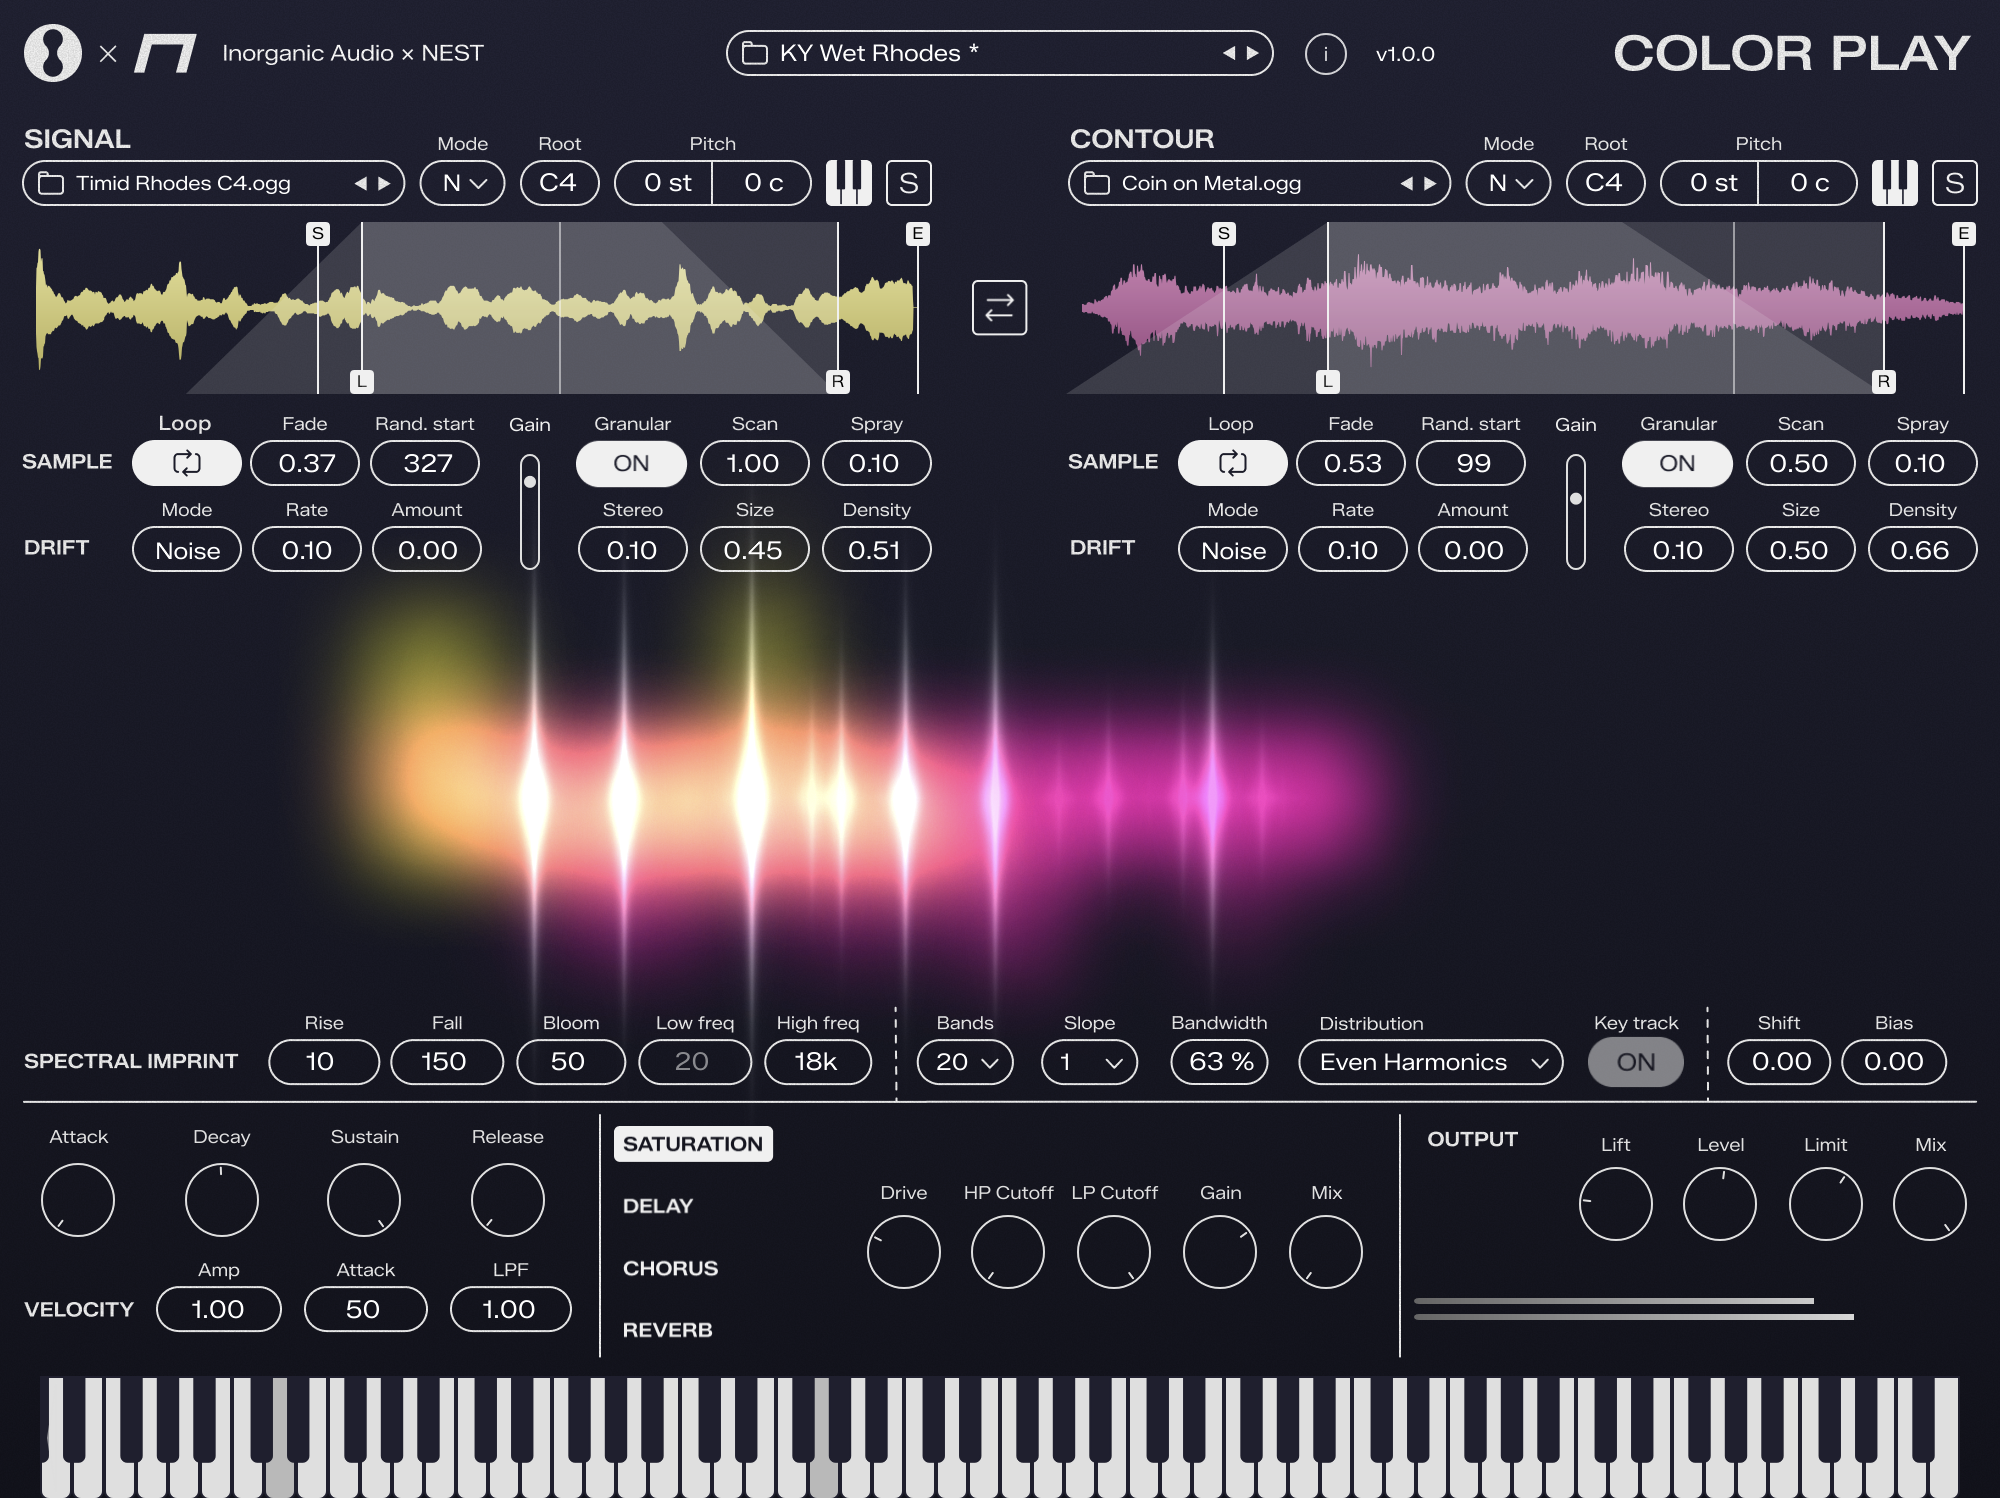
Section 1: Sampler Area
Signal: The yellow sample is your audible source. Feel free to browse the hundreds of factory samples, or drag and drop your own into the sampler area.
Contour: The pink sample is not audible - it acts as the “modulator”, shaping the spectral envelope of the yellow source.
Mode: Select the behavior of playback as follows -
Normal: Just as you’d expect, it plays a new copy of your sample with each note pressed.
Continuous: First note press triggers a single playback of the sample, and continues regardless of more notes being pressed or notes being lifted off. Allows you to have a single sound source running perpetually instead of stacking numerous disparate playbacks of the sample. Great for importing a long environmental field recording, etc.
External: Disables that sampler and routes a sidechain input through the engine. Check your DAW for setting up sidechain! Amazing for sending vocals or percussion in real-time.
Root: Set the root note of the sample.
Pitch: Adjust the semitones and cents of the sample.
Keyboard Icon: Toggle keytracking on/off. Sometimes you don’t want a source to change its pitch with your MIDI notes!
“S” Icon: Solo the sampler to audition without Color Play processing to hear the dry source.
Sample Start: Set where playback begins on the sample.
“L” and “R” Lines: Set the loop points on the sample.
Back-and-Forth Arrows Icon: Click to swap the routing of sampler engines. All settings get carried over to the other side. Just a quick way to alternate which engine is acting as Signal vs Contour.

Section 2: Playback Controls
Loop: Toggle looping on/off.
Fade: Control the crossfade from loop end to loop restart.
Rand. Start: Control the amount of randomization on the playback start position.
Drift Mode: Choose a modulation shape for pitch drift.
Rate: Speed of pitch drift.
Amount: Range of pitch drift.
Gain: Sampler playback volume.
Granular: Toggle granular playback on/off
Scan: Control the speed with which the granular playhead moves through the sample (at 0.00 the grains stay in place)
Spray: Increases the randomization of where grains are generated around the current playback position.
Stereo: Increases randomization of the panning of each grain generated.
Size: Controls the length of each grain slice.
Density: Controls how rapidly new grains are generated.
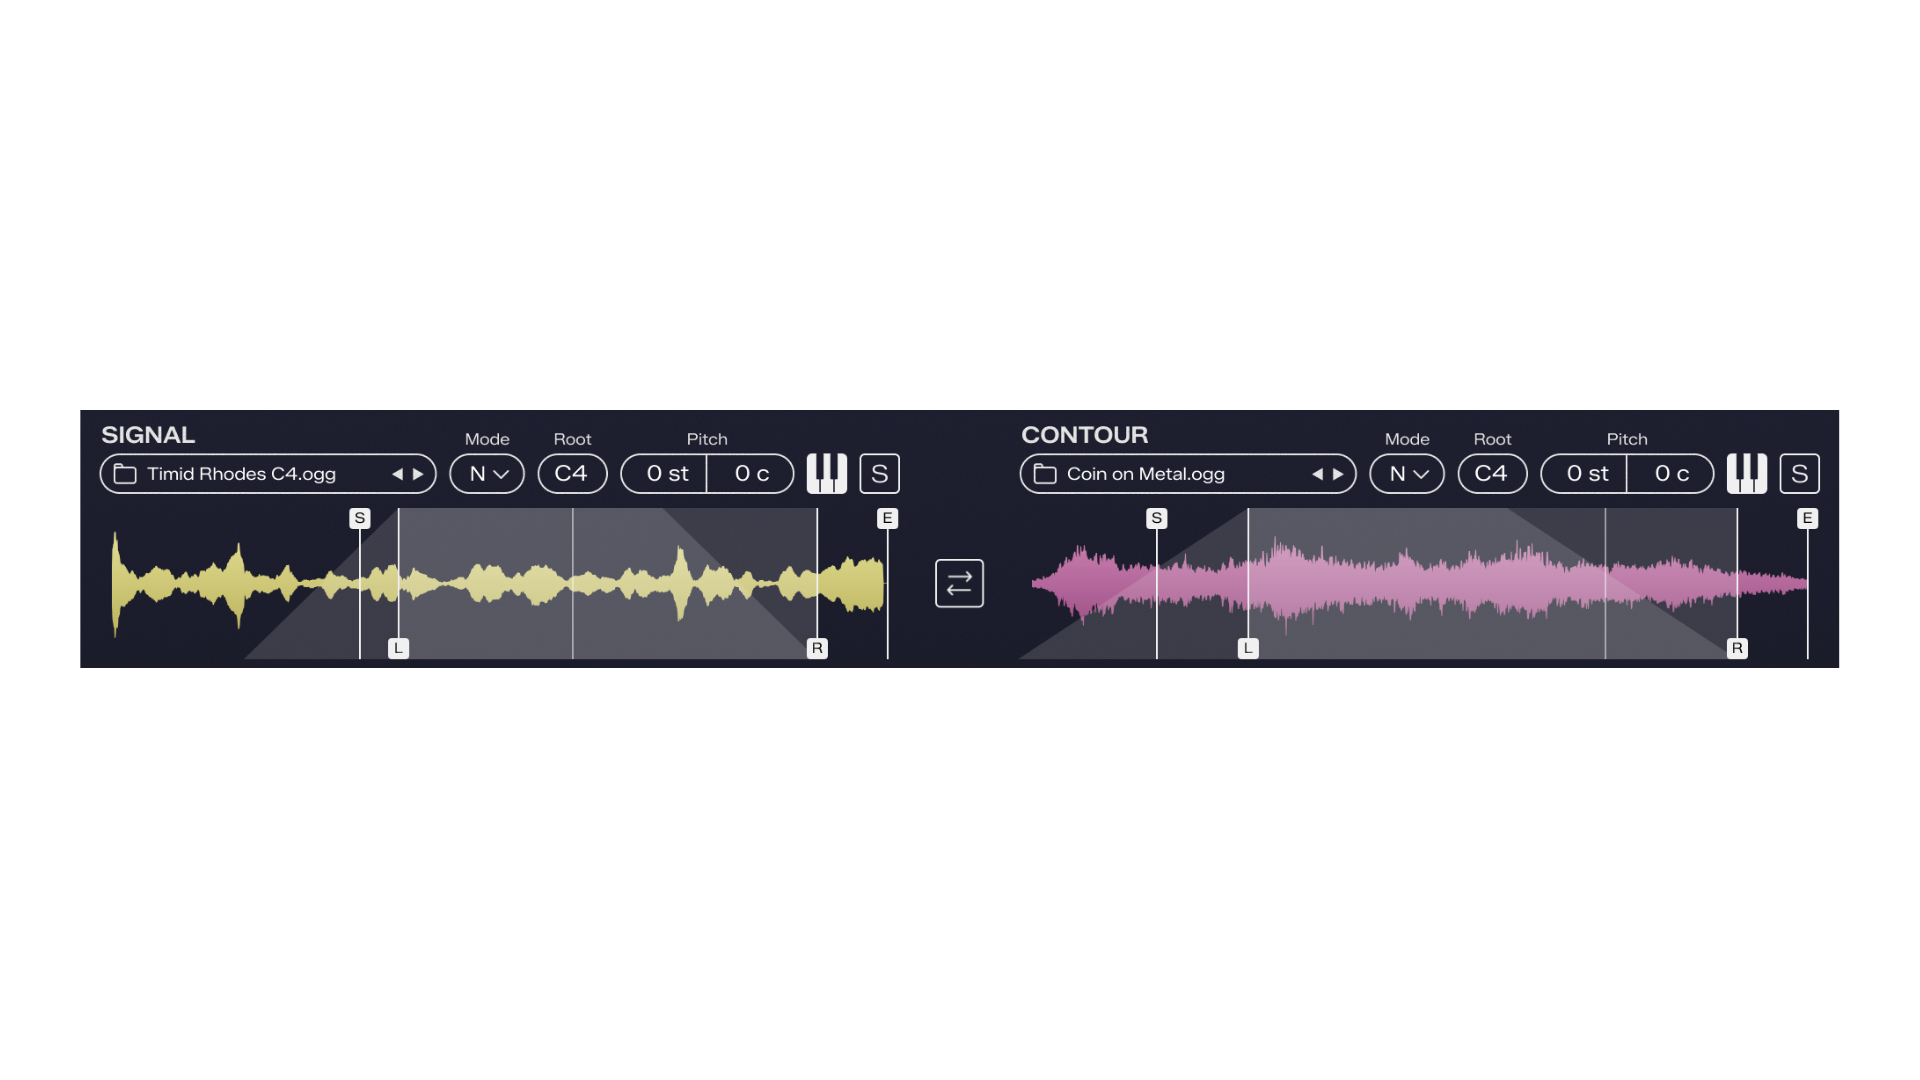
Section 3: Spectral Imprint
The heart of Color Play; the Spectral Imprint divides your Signal into little frequency windows. Then the volume of each frequency window follows the amplitude of the same corresponding frequency window in your Contour audio. This whole process is cloned and applied discretely for each separate MIDI note you press.
Rise: The speed with which each frequency band increases to match the Contour’s amplitudes. Higher values smooth out the response, whereas lower values create audio rate modulation similar to AM distortion.
Fall: The speed with which each frequency band decreases after reaching the Contour’s amplitude at any given moment. Higher values create long tails to the spectral shape, whereas lower values create audio rate modulation similar to AM distortion.
Bloom: A sort of spectral compressor, flattening the harmonic balance toward a “white noise” frequency response (almost always resulting in a nice brightening and overall increase in low level information detail)
Low freq / High freq: Limits where the lowest and highest frequency windows can reach. Low freq is disabled when “Key track” is on.
Bands: Select the resolution, or number of frequency windows.
Slope: Choose the steepness of the frequency windows. “1” is a more gentle roll-off, allowing more of the Signal through each window.
Bandwidth: Set the width of each frequency window. This scales differently depending on the Band number and Distribution setting.
Distribution: Choose how the frequency windows are placed along the spectrum.
Logarithmic: Harmonically agnostic, spacing the bands similar to standard EQ scaling. “Key track” can be toggled off in this mode, so the bands remain stationary like a traditional vocoder.
Octaves: Spaces bands at octave intervals starting from your MIDI note root frequency.
Even Harmonics: Spaces bands along the even harmonic series, including the fundamental starting from your MIDI note frequency.
Key track: Controls whether the bands distribution follows your MIDI notes, specifically for Logarithmic mode. This also overrides the “Low freq” parameter since the lowest band is determined by MIDI note.
Shift: Offsets the low or high bands. Especially nice for chopping off the lower bands by shifting up.
Bias: Tilts the frequency balance. Positive values emphasize higher bands while quieting lower bands. Negative values emphasize lower bands while quieting higher bands.
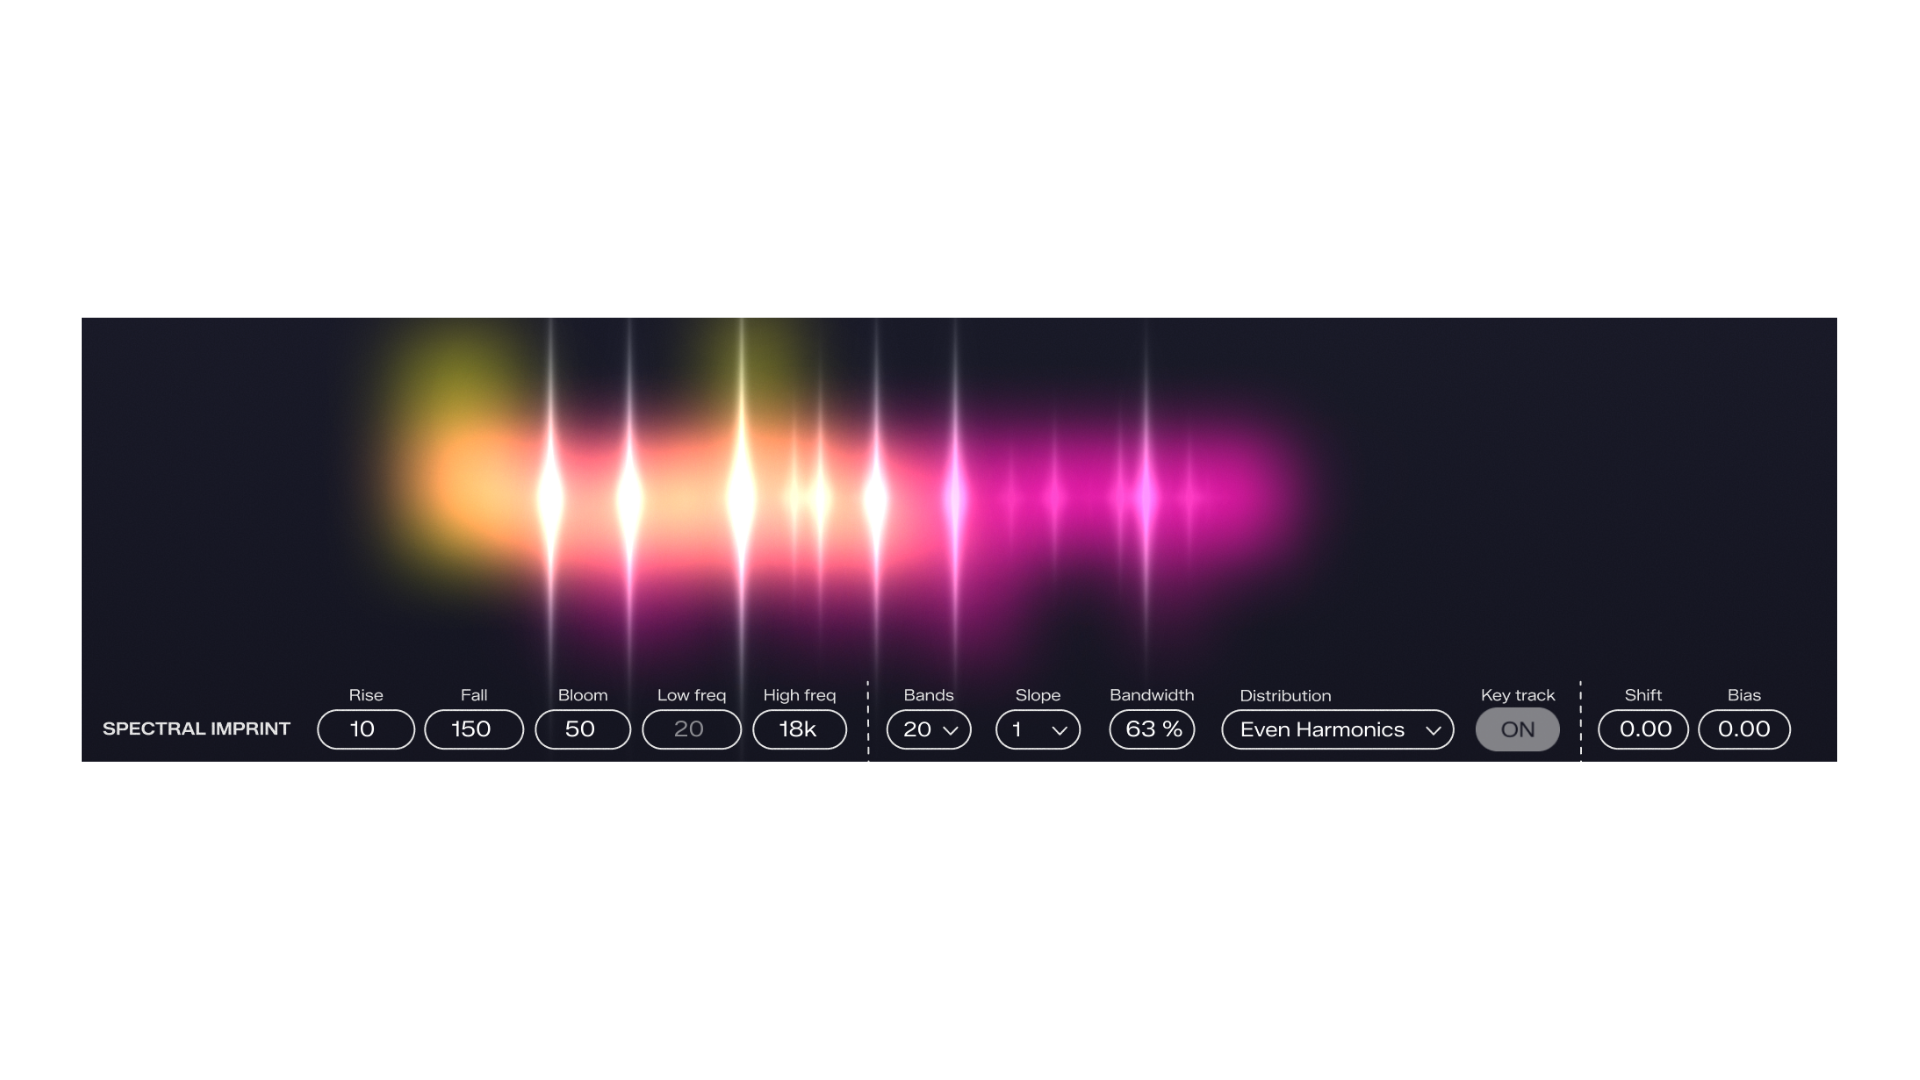
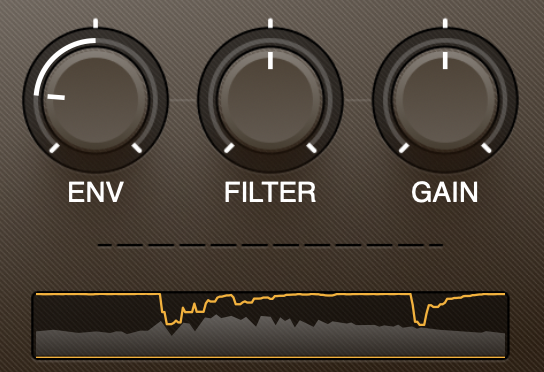
Section 4: Envelope Controls
ADSR: classic control over the amplitude envelope applied to each voice post-spectral imprint.
Velocity: Scale how much your MIDI velocity affects the amplitude, attack speed (softer velo = slower attack), and lowpass filter.
Section 5: Output
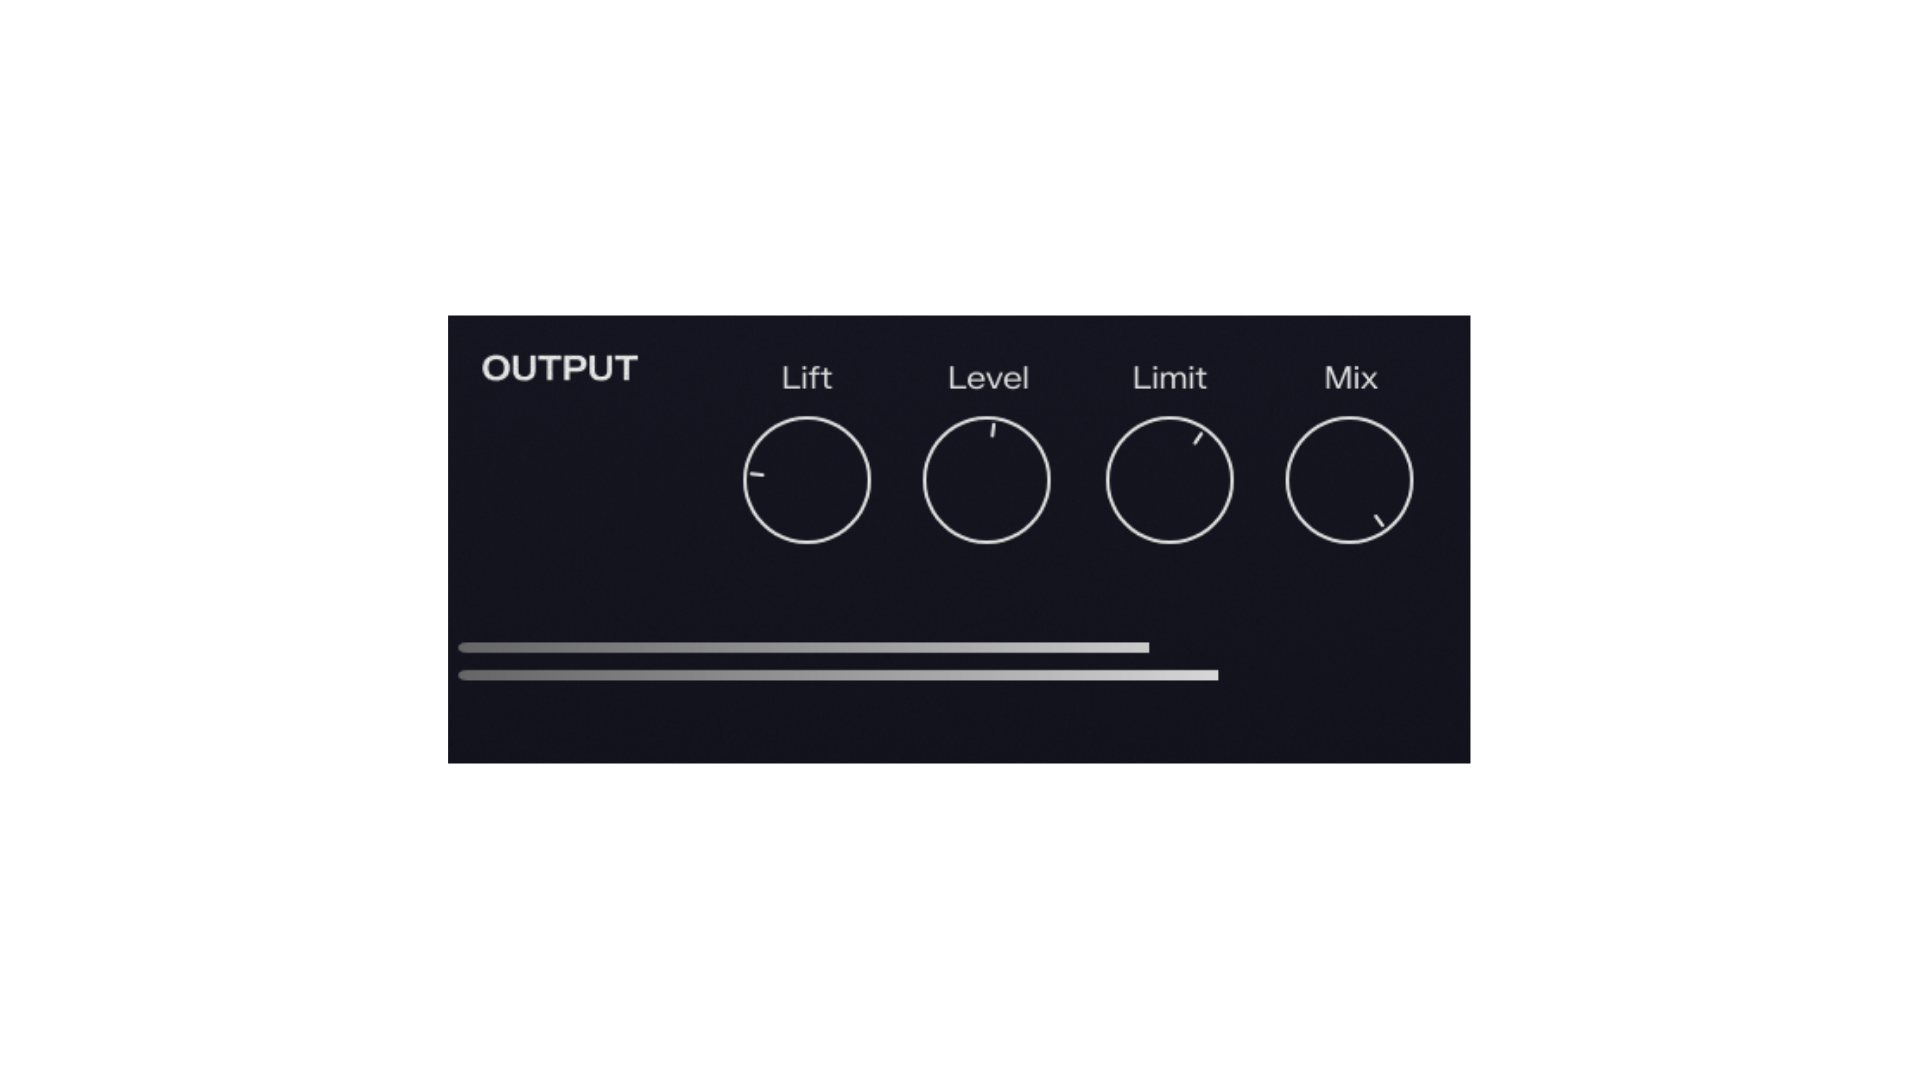
Lift: A broadband upward compressor designed to bring up detail and support overly dynamic outputs due to the nature of some foley/field recordings etc.
Level: Simple output gain control.
Limit: Set the ceiling at which a soft limiter/compressor starts acting on peaks (no lookahead to maintain zero latency; there will still be some overs when pushed hard).
Mix: Values below 100 blend in the fully dry audio from the Signal engine.
More from NEST:


Lifetime access to every Serum preset made by NEST now and forever.


The game-changing ghost saturation effect

All synth presets, melody packs, and in-depth sound design courses.